28 March 2009

The tortoise takes over - slow but steady

With just a two weeks left, I've hit that uncomfortable stage of pregnancy where everything I do takes great effort. Half the time I feel like I'm tied to a lead cannon ball and it's only a matter of time before I'm thrown overboard to Davy Jones' Locker.

Nonetheless, I'm still helping Kevin with the basement tiling. We made some good progress last weekend. Savannah's bedroom is now completely tiled as is the guest bedroom and much of the hallway and bathroom. All we have left now is the rest of the hallway (and then the grouting and caulking and trim work and paint touch ups...).

Last Sunday I only helped tile until the afternoon then Savannah and I went off to experience Maple Sugaring Sunday in upstate New York. There's a wonderful sap shack near us called Woodview Sugarbush. They use both the vacuum extraction and galvanized metal bucket methods of tapping. Savannah was impressed to see and taste all the maple syrup they make. My favorite is always spending time in the sugar shack as the sap is boiling down. It's better than any facial you could receive in a spa as the water vapors fill the air and moisturize your skin with the sweet aromatherapy of maple syrup. I brought back a gallon of dark maple syrup for Kevin and when he saw the sticker price for it, his only comment was, "I would've bought three." (I'd like to see him carry three gallons of maple syrup down a steep hill with Savannah a half mile to the car...)

I was hoping to grout Savannah's bedroom myself this week after finishing one more book but everyone tried to convince me to wait for the weekend since they say grouting is better done with two people. Unfortunately, sometimes the best way to get me to do something is to tell me I can't do it (without giving me a very good reason why). So, on Friday afternoon I grouted the guest bedroom myself. It went very well for the floor, not so well for my lower back and heart burn.

Close up of the dried grout on the tiles.

The guest bedroom (otherwise known as my project room) all tiled and grouted. There is still a small amount of hazing on the floor but it will mop up easily once the grout is dry enough. I have sponge-cleaned it twice and used a dry rag to polish the tiles but didn't get everything.

Today I grouted Savannah's bedroom with similar results (ie nasty heart burn, great looking floor) while Kevin worked on solving a plumbing problem.

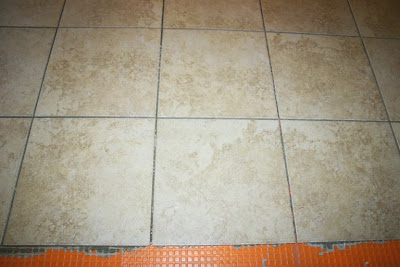
Here's a close-up of the grouting in Savannah's room, not yet dry. The lot of tiles we used for her room was slightly different - a brighter gold, shinier, and slightly larger - but we had enough of the lot to complete her room.

A view of Savannah's room with the grouted tiles (and hazing on the floor) from her closet.

My body has had enough of grouting for now so tomorrow I tackle the trim in the guestroom and Savannah's room. I should be able to do the trim work myself. Kevin has a great table saw that makes perfect angle cuts and one of the things I'm actually good at is using it. (Somehow I've missed the basics in nailing and screwing wood in a square frame and often have difficulty with stripping screws because I don't drill a pilot hole large enough or I choose the wrong nail for the job so my nails end up bent or splitting my perfectly cut wood... I'll learn eventually though!)

All the time spent on my hands and knees in the past two days is actually good for baby's positioning so I can try to prevent back labor but bending over like that gives me terribly painful gastroesophageal reflux that is frequently associated with late pregnancy. I sympathize with anyone who suffers from GERD.

26 March 2009

Pillows, pillows, and more pillows

While I've always appreciated how quickly a change of pillow cover can coordinate a room, I've never been a big fan of a pile of decorative pillows. My philosophy is function first, then make that useful item as beautiful as possible.

Since we're doing well with the tiling and grouting, I decided to go ahead and knock off some pillows for the sofa I ordered in red microfiber for the family room. I figure if I don't get it done before baby arrives, it might be put on the back burner for a long time and Savannah deserves a finished playroom of her own.

Pair of sofa pillows and covers for Savannah's playroom in Alexander Henry's Kleo on the front and Esprit stripe on the back. Removable with button and ribbon closure and machine-washable - a necessary feature for young kiddies!

I made the playroom curtains in Alexander Henry's Mocca fabric so I decided to use the coordinating Kleo and Esprit stripe fabrics for the sofa pillows. Both pillows are an easy 20" x 20" square and I made a back flap of fabric with a button (that Savannah selected herself) so I can machine wash them.


The back view of the pillow covers in Esprit stripe with the turquoise ribbon and bright red buttons Savannah picked out for the button closures.

I want a very child-friendly playroom with safe floor space for moving and playing so instead of cluttering up the space with extra furniture, I'm making floor cushions that are 24" x 24" for the kids to sit on. Savannah tested the pillow forms out at JoAnn's and loved the big ones best. JoAnn's is having a 50% sale on all pillow forms this week by the way, including their "Nurture Nest" U-shaped pillow form, which is identical to a Boppy (except it's only $10). Coming up next - two coordinating floor cushions.

22 March 2009

Pesto is the besto!

I love how easy it is to make a fresh pesto sauce at home. I haven't been able to eat store bought pesto sauce for the past few years now that my taste buds have adapted to the real thing.

Savannah also adores pesto and makes most batches nearly by herself. I should've known at 8 months when she used to crawl around and eat my fresh potted herbs (basil, rosemary and thyme) until there was nothing left of them that she would be a pesto lover too. Savannah won't eat my fresh marinara sauce or my roasted red pepper sauce but she'll eat pesto with a spoon as if it were yogurt. Here's our recipe:

Easy Peasy Pesto Sauce Recipe

1. Wash your sweet or Italian Genovese basil leaves in a colander and use a clean kitchen towel to blot the extra water off (if you accidentally use the spicy Thai Basil leaves, you'll burn your tongue and might swear off pesto for a year!).

2. Add to your food processor:
  • 1-3 cloves of smashed garlic (by taste and size of garlic cloves)
  • 1/4 tsp to a 1/2 tsp of Kosher or sea salt (by taste - you can always add more later!)
  • 4-8 Tb good extra virgin olive oil
  • 4-6 Tb of your favorite nut (toasted pine nuts are the most commonly used but we prefer raw walnuts and raw pecans)
  • and about 2 cups of fresh basil leaves pinched from their stems
3. Pulse together until well blended. Add more olive oil if needed.

4. Add to food processor some Parmesan (about 2-4 Tb or so) or other aged cheese (if you're vegan you can omit cheese altogether, or make it extra cheesy for your kids) and 1 Tb of canola oil (see below). Pulse together, taste for adjustments, and enjoy.

Notes: If your pesto seems to be missing something, try a few turns of the pepper mill.

If serving over pasta, consider adding a side bowl of freshly diced tomatoes when they're in season. The sweetness and juiciness of the tomatoes accents the pungency and saltiness of the pesto very well and gives you an extra serving of fresh fruit and fiber.

If you've never tried it, you might try substituting raw walnuts for toasted or raw pine nuts in your pesto sauce. Walnuts have the best flavor for pesto in my taste buds' opinion. In many Amish communities across America, sunflower seeds are used in place of pine nuts in pesto sauces.


Sara's secrets


When making pesto at home, replace 1Tb of olive oil with 1Tb of canola oil per batch of pesto. The canola oil, while having a higher amount of polyunsaturated fats, will keep your pesto from oxidizing (a natural reaction that many herbs, fruits and veggies have when exposed to oxygen in air) so it keeps its vibrant green color without turning brown.

It took me a long time to discover this and while my pesto always tasted great when I stored summer and fall's bounty in the freezer for winter (or even for just an hour in the fridge before company arrived!) it always turned brown on top no matter how much olive oil I poured over it. Now my pesto is a bright beautiful green without any preservatives no matter how long I store it!

Notes: You could also try using sunflower oil or safflower oil if you're out of canola oil but I don't recommend using these oils based on their fat profiles - extremely high in polyunsaturated fats and extremely low in monounsaturated (aka good) fats. I also don't recommend cooking with canola oil since it easily breaks down into trans-fatty acids when heated.

20 March 2009

Chick Crazy - Brooding over Brooders

We have a baby on the way in a few short weeks and I've promised to make my daughter her very own sandbox this spring with a little digger in it but all she seems to care about is raising chicks. My husband was really worried when he found out I'd ordered six Rhode Island Red pullets (just one day old!) arriving April 17th. This is right after my due date and we haven't built the hen house yet and he was worried that the chicks would need their coop by April. He didn't realize that the chicks won't be ready for the coop until at least 8 weeks when their feathers come in and the weather is warmer. They will need a brooder until then but I tackled that project today with a little help from my eager-to-hold-and-feed-chicks daughter.

I started with a 90 quart plastic storage bin with lid and clear sides ($9) Apparently chicks don't like to be surprised and they prefer it when they can see you coming since their sense of sight and hearing are their strong points. The clear plastic sides take care of that.

On a workbench, I used an exacto knife to cut out half of the lid (approx 11"x 15" opening). For only six chicks, this should provide them with enough ventilation and a spot to place the warming light they'll need in the first few weeks of life. But it took me four tries on each side to get the exacto knife to cut through all the way. Using a jigsaw though seemed like too much for this project.

The opening cut from the lid.

Then I cut some 1/4" hardware cloth (with my little jewelry metal wire clippers) that was 1" larger on all sides than the opening, or 13" x 17" ($6 for a roll). I folded the sides over neatly to avoid the cut edges and tried to use my staple gun to staple the wire mesh to the lid opening but it didn't work. Plan B was to make a wood frame of 1"x1" wood to staple the wire to and that worked out much better ($0.65 for 8' strip of 1"x1" oak). My plan was to bolt this down to the plastic lid with little washers on the inside but the wood seems to hold the hardware cloth in place very well and it would be nice to be able to lift this section up to reach in quickly rather than undoing the whole lid for access.

Here's the opening with the mesh frame on top and the flood light ($10 and will be reused for the greenhouse later) sitting over the opening. I've read in a few different books on raising chickens that red bulbs are considered best for the chicks. They are attracted to red things and it is believed that the red light prevents them from pecking at each other. The flood light bulb I chose was a 100 watt (no 85 watt available) so I most likely will have to suspend it over the opening to prevent it from getting too hot inside the brooder. It is nice to be able to raise the lamp up and down to monitor the temperature and adjust it weekly as they grow.


Here it is with the lid snapped in place. The chicks should be happy enough in here with a towel or paper towels for litter beneath them for the first few weeks. It will also be easy to clean, transport, and to keep inside the house while they're really young (all messes contained). Plus, it cost me only $26 in materials and I still have lots of hardware cloth left for other uses. I've heard of people happily raising their chicks in whatever they have on hand including cardboard boxes (although these have to be changed frequently as they get soiled), bathtubs, aquariums, and large feed or water troughs. I like being able to see the chicks all the time through the plastic sides and being able to easily transport them in and out of the house (or around the house) to let them experience a sunny day outdoors with some grass clippings or other items of interest in their brooder.

Here's the inspiration brooder for this project with instructions and photos.

I'm so excited to pick up our fuzzy little flock of chicks! I think it will be a great project for Savannah (and for me to oversee) as the chicks will be a great distraction from baby in the early weeks as she gets to play "Mommy". She's been reading almost exclusively about chicks for a week now and can already tell you how to cure pasty butt and spraddle legs. Who knew that farm life could be so educational!

14 March 2009

Labor of love - Nana's memory quilt

I've been working in secret on a memory quilt for my mother in law's birthday. This is my first memory quilt and the fastest I've tried to pull off a quilt of this size.

Smiling faces and poems for the front. And yes, this started out as five large disappearing nine patches. (Guess I'm on a roll with those!)
The back is pieced with a strip of 8" fabric and notes from her grandchildren. They are all cute messages, but I think my favorite is the footprint of baby Evan. That tiny footprint pretty much says it all.


Some details up close.


The practical:
My husband thought purple was her favorite color and I rarely see her without a Vera Bradley bag of some sort usually in purple, blue or green, so I chose fabrics in these colors from my favorite fabric designer, Kaffe Fassett.

It's lap size (50" x 60") because my mother-in-law is a knitter and while knitting warms up your forearms, it leaves the rest of you chilly unless you're sitting beside a warm fire or can knit while walking on a treadmill...

Because of the high recommendations it received, I used Printed Treasures sew-in fabric for the photos and artwork. I haven't had a chance to wash the quilt yet since I just finished in time for her surprise party today, but I've got my fingers crossed that all the positive reviews are accurate when they promise the printed fabric can be washed.

Savannah's picture in the quilt. She was most excited to have been placed in the same row as her cousin Abby - the girls share the same temperament; imaginative, creative, sensitive, affectionate.

The rest:
I really wanted to make something special for her birthday. As I started the project I realized that this was not so much a gift from me as it was from all of her grandchildren - their smiling faces with toothy grins and cute notes of love and appreciation for their Nana. That's what makes the quilt special. Really, it's all these little people that make up her legacy. I hope she enjoys it.

Things I learned:
No matter how alluring the thread-count and manufacturer's name, don't use tightly-woven fabrics for the quilt back. Even though it seems simple and plain to use a quilter's cotton or a muslin for backing fabric, it is easier to baste and quilt and hides needles and threads better.

Don't keep your magnetic pin cushion anywhere near your sewing machine. The magnet can cause your machine to go haywire.

Keep an assortment of sewing needles on hand for troubleshooting issues that arise with different fabrics when sewing. Sometimes the best needle for quilting is not a quilting needle but a denim needle or sharp needle.

EQ6 quilting software can be really helpful, when you have limited fabrics or time and can't "play" around with a design. After using it for a week, I give it an 8-star rating (out of 10) since it is missing some features that would have made it easier to use. Here are some of the designs I considered:

A modified log cabin - I almost made this one but thought I was too short on time. The heart in the bottom corner was an applique I considered adding, but it seemed to draw too much attention away from the grandkids.

Another layout for a disappearing nine patch quilt. In the end I decided I wanted the kids' pictures and art to be the showcase, not a more artistic design.

A straight-forward alternating square block pattern that I still really like, but was worried that my choice of such vibrant fabrics might not blend as well with this design.

08 March 2009

Laying the Ditra to tile the basement floor

Now that the work is done in retro-fitting the basement floor with radiant heat, it is up to us to finish the rest. Kevin swabbed a sealant layer over the new subfloor last weekend and yesterday, we laid the Schluter-Ditra uncoupling membrane down. It's main purpose is to separate the newly poured gypsum slab from the tiles above it, leaving each layer room to contract and expand at its own rate without cracking the tiles. It's especially important with radiant heated floors like ours. It also helps to evenly distribute the load of tiles and serves as a protective moisture barrier.


Laying out the Ditra with thin-set in the downstairs bathroom.


It took us just one day to lay down all the Ditra, although on Friday I prepared for this by laying it all out and custom cutting the pieces to fit each room. The bottom fleece layer of the Ditra is attached to the subfloor with a thin-set mortar (mixed to the consistency of waffle batter). We have a good system going where I mix the batches of mortar, Kevin lays it down with the V-notch trowel (since he's the one with the knee pads), I help to lay out the piece of Ditra so it lines up properly, one of us uses the floats to smooth it in place and ensure good contact with the thin-set below and Kevin hauls in the new 50 pound bags of mortar to mix. I take small breaks when it gets cumbersome to lean over my beach ball-sized belly.

Savannah plays ball in her newly "Ditra-ed" room.


Today we tackled step three of tiling over the Ditra, but we depended on a neighbor's help for laying it all out first to get a good grid. He helped us decide what to do about the non-square rooms as well, since we weren't exactly sure about that. With the 18x18" tiles we chose, it's been a snap to lay them down now that we're working from a good grid. Our neighbor also left an extra pair of knee pads so I'm helping to apply the mortar with the notched trowel and to place and space the tiles with Kevin. We are thrilled with our good fortune in finding helpful and kind neighbors with a strong sense of community.

The plan is that while Kev is at work, I will measure and mark the tiles that need to be cut and label them sequentially so when he has a free moment, he can simpy pick up a pile of tiles, cut them on the marked line, then we'll have them all labelled to be set down when we have the chance. It should go faster that way. Teamwork is a great thing.


So far so good! 87 tiles down which comes to about 200 square feet of tiling today.

Mortar will come last after all the tiles are cut and laid- these tiles are still drying and setting.

Also, after yesterday's finding I took Savannah to the emergency care clinic today and am thrilled to say, they took us very seriously and we were treated "by the book". They sent the engorged tick to a lab for processing (I brought it in our tick jar that is half-filled with rubbing alcohol), Savannah walked out with a week's supply of Strawberry Creme flavored prophylactic antibiotics and in four weeks, she'll have a blood work follow-up to be sure she doesn't have Lyme disease. I couldn't be happier with the service. Lyme disease is a reportable illness since it's important for officials to keep on top of the demographics for the spread of this disease. The doctor also said that I had removed all of the mouth parts but there was a small scab in the center of the red infection that I had mistaken for a mouth part. Still, I'm special ordering the fine tipped tweezers because until our guinea hens are engoring themselves on daily meals of ticks, we will probably need them again and again...

If only...

Tonight was one of those nights where you wonder whether you're going to win the bad mother of the week award.

If only I had listened to my daughter first thing this morning when she complained that she had bumped her head and asked me to look at it.

If only I had given her the usual daily bath last night.

If only I had brushed and combed her hair this morning like I do every morning and fixed it in braids or pony tails.

If only I had reimplemented daily "inspection" after our walks outdoors.

If only...

But I didn't and tonight after her bath I brushed out her hair and when she complained once more about the "ow-ie" bump on her head, I finally did look (12 hours later) and found firmly attached to the base of her head, an engorged deer tick that in my calculations, had certainly been there for more than 24 hours, crossing the threshold into the dangerous time period for B. Burgdorferi infection, the dangerous little pathogen that causes Lyme disease.

She had a small red, infection site immediately around the tick, not yet a ring, but I expect to see one soon if I can't get her on prophylactic antibiotics tomorrow or Monday. This isn't necessary in most areas of the country but we happen to live in one of the highest risk regions for Lyme disease, where this is common protocol. Seeing the tick's fat little body engorging on her blood with its legs wriggling in ecstasy, my heart just fell. No matter my feelings about something, I can handle almost any sort of situation with perfect calm on the outside. I did not tell Savannah that there was a tick embedded in her head until after I had removed the "ow-ie" so she wouldn't freak out. I consulted three tick removal guides to be sure they were in agreement before removing it and saved the tick in our "tick jar" for identification purposes. It was a deer tick (Ixodes scapularis), which is capable of transmitting B. Burgdorferi, but I can't tell whether it was a nymph or female, most likely the latter.

As soon as I told Savannah what the cause of her "ow-ie" head bump had been, she cried about it and had a lot of questions about ticks. She was very brave. It's gross to think of a tick cementing its mouth to your skin and drinking your blood. (Serendipitously, I'm working on a book right now about animal infectious diseases and just completed a chapter on Lyme disease.)

I had no idea that we were at risk for tick bites this late in the winter. Into late fall of last year we had mandatory tick inspections after each afternoon outside and evening baths with a quick body check in the mirror. I see now we'll have to make it a year-round process that hopefully our future guinea hens will help us solve. In the meantime my penance is a sleepless night in which imaginary ticks crawl over my skin searching for their next meal.

04 March 2009

Up for air

Between work work (my business), work on the house (renovations and projects), regular home work (cooking, cleaning, child-rearing, etc), and the work of growing of a baby (I'm starting to feel uncomfortable in my body), I've been running pretty ragged lately. Here are some of the quilting projects I've been working on (a few of which are actually completed).


I finished Baby Sophia's quilt yesterday. I've been working on it in bits and pieces between other things and finally had the chance to quilt it over the weekend and bind it yesterday afternoon. I really like the way it turned out. I think a baby would be fascinated by its bright and contrasting colors. I made a mistake in shifting the back fabric while quilting it together and had to piece together another scrap to finish the back but, that's what quilting is all about anyway, using the pieces of what you've got to make something different, whole and useful.

Tacked up to the design wall - can't imagine I ever lived without one.

Here's the back in bright pink and white polka dots. Very colorful!

I've also been experimenting with two different disappearing nine patch quilts inspired by another quilter's work. I've been trying to make one for a little girl who was sick in the hospital and has now recovered but I think it's too bright and cheerful now that's she's home with her family again...


Here are the squares up on the design board, just hanging out until I finish it up.


See what I mean - BRIGHT! BRIGHT! BRIGHT! So, I may put this aside for now and finish it for charity later or for another sick child. I will have to find another quilt to make for this special little girl so the next time (hopefully there will never be a next time but since the doctors don't know what's wrong with her...) she's in the hospital, she will have a warm, bright cheerful thing to take with her.

Here's another disappearing nine patch I started with some Moda fabric from a 5" charm pack. It's not fabric I would normally buy so I've had it sitting around my fabric stash for a long time. It might end up turning into a doll or bear quilt for Savannah.


One minute, you think you're a nine-patch...


and the next you find you've been turned upside down...

In the meantime, I broke my fabric diet and purchased a large amount of Kaffe Fassett fabric to make my next quilted wonder with a special person in mind. Kaffe Fassett is my favorite fabric designer and whenever I need a little winter therapy or rainy day pick me up, I just browse their latest fabrics. Plus, I found a new Kona cotton fabric line with a 200 thread count that JoAnn's is selling for backing fabric. I love it. It was hard to stop rubbing my cheek against it so I think it will be a great addition to a future quilt. Until it arrives though, it's back to home renovations. This weekend we tackle the basement tiling project...